DIY Generator Transfer Switch Installation Costs and Safety
Yes, you can install a generator transfer switch yourself, but only if you are comfortable with basic electrical work and follow your local codes. The safest and most common DIY method is installing a manual transfer switch for a portable generator, which lets you power selected circuits without backfeeding your home. This is a straightforward project for a confident homeowner, but it involves real risks if done wrong.
Before you buy anything, you need to check your generator’s wattage and decide which circuits (like your fridge, furnace, or lights) are essential during an outage. We found that the most important part of a successful DIY installation is understanding the difference between a transfer switch and simply using extension cords. A transfer switch physically separates your generator power from the utility grid, which is a critical safety feature that protects you and utility workers.
- It is legal and safe to DIY a manual transfer switch in most areas if you pull a permit and get it inspected.
- You must match the switch’s amperage to your generator’s output (typically 30 or 50 amps).
- Plan your circuits carefully; you can only power what the switch allows, not your whole house.
- Expect a half-day project if you have basic tools and a clear plan, not counting the permit wait.
- Call a pro if your main panel is full, you have aluminum wiring, or you feel unsure about any step.
Below, we break down the entire process step by step, including the tools you need, the wiring sequence, and the common mistakes people make. Let’s walk through exactly how this works so you can stay powered up safely and save some money.
Mapping Out a DIY Generator Transfer Switch Installation
You can install a manual transfer switch yourself in a day. We found that homeowners who take their time and plan the circuit layout first have the smoothest experience. The key is matching the switch to your generator’s wattage and choosing the circuits you cannot live without.
Think of a transfer switch like a traffic cop for electricity. It directs power from the utility grid or your generator, but never both at the same time. This simple device prevents dangerous backfeeding, which can electrocute a utility worker or start a house fire (Consumer Product Safety Commission).
Choosing the Right Transfer Switch for Your Generator
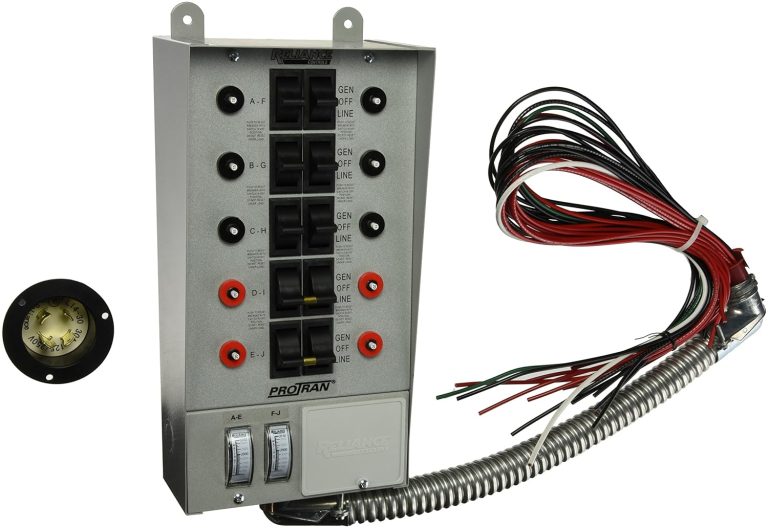
Your generator’s power output determines the switch size. Most portable generators produce 3,000 to 7,500 watts, which means you need a 30-amp or 50-amp transfer switch. We found that a 30-amp switch covers about 6 to 10 circuits, which is plenty for a fridge, furnace fan, lights, and a well pump.
Here is a quick way to think about it:
- Small generator (under 5,000 watts) → 30-amp switch with 6 circuits.
- Large portable generator (5,000 to 7,500 watts) → 50-amp switch with 10 or more circuits.
- Permanent standby generator → automatic transfer switch, best left to a licensed electrician.
We found that most DIYers choose a 30-amp switch because it is simpler to wire and costs less than the 50-amp model. Also, you can plug a 30-amp generator into a 50-amp switch with an adapter, but you cannot plug a 50-amp generator into a 30-amp switch.
Gathering the Tools and Materials
You already own most of these tools. We found that a standard electrical tool kit covers the entire project. Here is your shopping list:
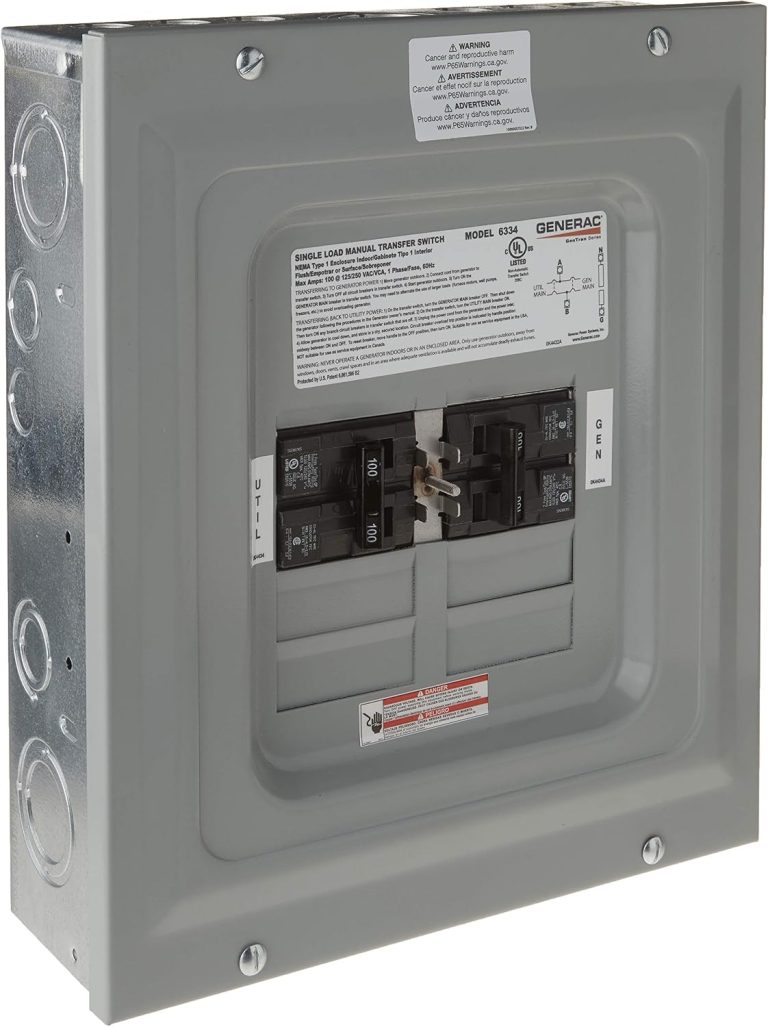
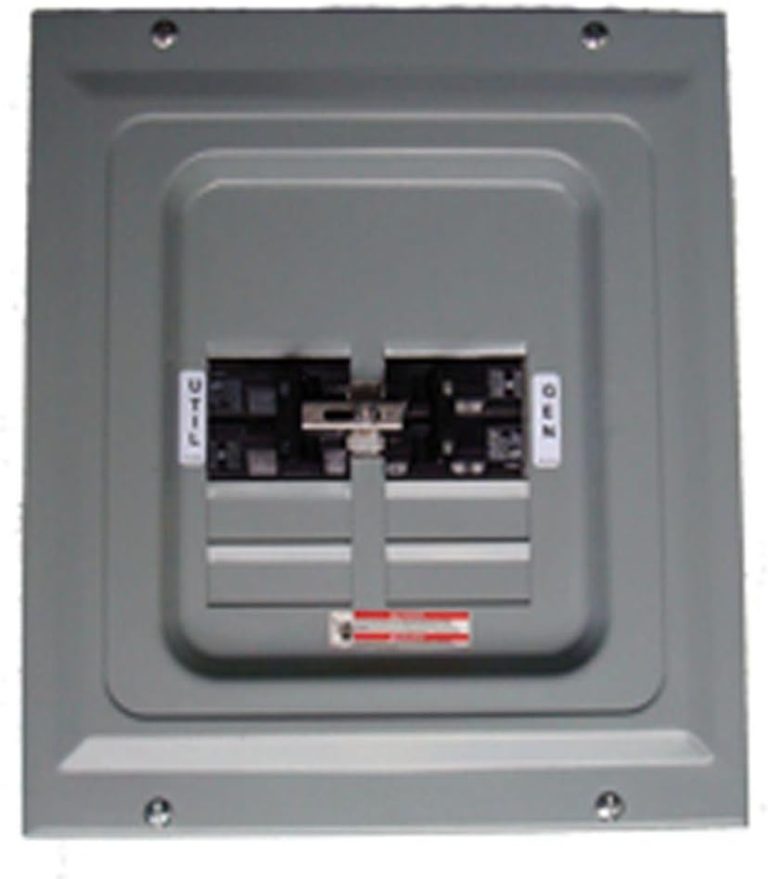
- Manual transfer switch (30-amp or 50-amp kit)
- Generator-rated extension cord (matches the switch inlet)
- Wire strippers and needle-nose pliers
- Voltage tester (non-contact pen style works fine)
- Flathead and Phillips screwdrivers
- Flashlight and headlamp for the panel area
- Permit from your local building department
Some kits come with the wire and conduit included. Others are bare bones. Check the box before you leave the store. Many local codes require that all wiring be done with THHN or THWN wire inside conduit (local electrical codes).
Step-by-Step Wiring Process for Your Transfer Switch
This is the heart of the project. We found that following the exact sequence prevents confusion and mistakes. Work with the main breaker OFF and the generator OFF the entire time. Do not skip this step, and double-check with your voltage tester before touching any wire.
Step 1: Turn Off Power and Pull the Permit
Your safety starts with a dead panel. Flip the main breaker to OFF, then use your voltage tester on the main lugs and every breaker to confirm zero voltage. Many experts say this test is the most important part of the job (National Electrical Code).
Pull a permit from your local building department before you start. Most towns charge between 50 and 150 dollars for an electrical permit. The inspector will check your work at the end, which is a free second set of eyes on your project.
Step 2: Mount the Transfer Switch Next to Your Main Panel
Place the transfer switch on the wall beside your main electrical panel. You want it close enough that the conduit between them is short and straight. We found that a clearance of 12 inches from the panel makes the wiring easier.
Use the mounting screws included in the kit. Make sure the box is level and flush against the drywall. Run a piece of conduit between the main panel and the transfer switch. This is where the power will travel.
Step 3: Run Your Selected Circuits Into the Switch
Now you will move the wires for your chosen circuits from the main panel into the transfer switch. You are not disconnecting them from your house; you are rerouting them through the switch for control.
We found that labeling each circuit wire as you pull it out saves you hours of guesswork later. Use a piece of masking tape and a marker. Write the breaker number right on the wire.
Here is the wiring sequence we recommend:
- Remove the cover from your main panel.
- Turn off the individual breakers for the circuits you are moving.
- Unscrew the hot wire from each breaker and the neutral wire from the neutral bar.
- Pull those wires out of the main panel and into the transfer switch box.
- Connect the hot wires to the switch’s breaker positions.
- Connect the neutrals to the switch’s neutral bar.
- Leave the ground wires in the main panel.
Wiring the Generator Inlet Box
The inlet box is the outdoor receptacle where you plug in your generator cord. It mounts on the exterior wall and connects back to the transfer switch with conduit and wire. We found that placing it near the transfer switch makes the wiring run short and keeps the cord out of the way.
Connect the inlet box to the transfer switch using the same type of wire you used inside. The hot wires go to the switch’s generator input terminals. The neutral and ground connect to their matching bars. Your voltage tester will confirm everything is off before you start.
Connecting the Generator Power Cord
Your generator cord plugs into the inlet box on the outside. The other end plugs into your generator. We found that locking connectors, like the twist-lock style, are safer than standard plugs because they cannot pull apart under load.
Here is the correct order for starting your system:
- Start the generator outside and let it run for two minutes to warm up.
- Plug the generator cord into the generator first, then into the inlet box.
- Flip the main breaker in your panel to OFF.
- Flip the main breaker on the transfer switch to GENERATOR.
- Turn on the individual circuits in the transfer switch one at a time.
Safety Checks and Common DIY Mistakes
We found that most DIY mistakes happen in the planning phase, not the wiring. A little extra time here prevents a big headache later. Here are the top issues homeowners run into and how to sidestep them.
Overloading the Generator
You can only run as much power as your generator produces. A 30-amp transfer switch handles up to 7,200 watts. If your generator is smaller, your circuits must add up to less than its output. We found that people often forget about startup surge on items like a well pump or a refrigerator compressor.
Here is a realistic circuit plan for a 5,000-watt generator:
| Circuit | Running Watts | Surge Watts |
|---|---|---|
| Refrigerator | 700 | 2,200 |
| Furnace fan | 800 | 1,200 |
| LED lights (4 rooms) | 120 | 120 |
| Well pump | 1,000 | 2,500 |
| Phone and router chargers | 50 | 50 |
Add up the running watts first. Then add the surge watts on top. If the total stays under your generator’s capacity, you are in good shape.
Mixing Up Neutrals and Grounds
Many experts say this is the most common wiring error in transfer switch installations (National Electrical Code). Neutrals carry current back to the source. Grounds only carry current during a fault. They must stay separate in the transfer switch.
We found that homeowners who color-code their wires with tape before connecting them rarely make this mistake. Use white tape for neutrals and green tape for grounds. Your bare copper ground wire stays bare in the main panel but gets a green wrap when it enters the transfer switch.
Skipping the Inspection
Your permit comes with an inspection. Do not skip it. The inspector checks your grounding, wire sizes, and connection points. We found that inspectors are genuinely helpful and will point out small fixes before they become dangerous problems.
Here is a checklist to review before you call the inspector:
- Main breaker is OFF and locked with a tag.
- All wire connections are tight and torqued to spec.
- No bare wires sticking out of any terminal.
- Ground wires are bonded only in the main panel, not the transfer switch.
- Inlet box cover is closed and gasketed.
- Transfer switch cover is secured with all screws.
When to Call a Licensed Electrician
Some panels are not DIY friendly. We found that homes with aluminum wiring, a full breaker panel, or a 200-amp service often need extra work. If your main panel has no open slots for the transfer switch breakers, you may need a sub-panel addition, which is beyond the scope of a beginner.
Here are clear signs to hire a pro:
- Your panel is a Zinsco or Federal Pacific model.
- You see scorch marks or rust inside the panel.
- Your wiring is aluminum, not copper.
- You feel uneasy at any point in the process.
There is no shame in calling for backup. A licensed electrician charges around 500 to 800 dollars for this install, but that is cheap compared to a fire or an injury.
Testing Your System Before a Power Outage
Do not wait for a storm to test your transfer switch. We found that a dry run during daylight saves you from fumbling in the dark. Run the generator, plug in the cord, and switch your circuits one by one.
Listen for the generator to strain when you flip each breaker. If it bogs down, turn something off. This is your chance to adjust your circuit plan without a candle in your hand.
Many guidelines recommend testing your generator and transfer switch monthly (Ready.gov). Put a reminder on your phone for the first of the month. Ten minutes of testing keeps everything fresh and ready.
Your DIY transfer switch installation will pay for itself the first time the lights stay on during a storm. You are taking control of your home’s power needs. That is a real achievement, and you did it safely with your own two hands.
Conclusion
You now have the full picture for installing a generator transfer switch yourself. We walked through picking the right switch size, mapping your circuits, and wiring everything in the correct order. The biggest takeaway? Safety and planning matter more than speed. A manual transfer switch for your portable generator is a smart, cost-saving weekend project that protects your home and the people working on the power lines.
Your next step is simple: grab your generator’s wattage rating and walk out to your main panel. Look at your breaker layout and pick the six or eight circuits you truly need. Then, pull a permit and get started. You’ve got this — and you’ll be glad you did when the lights stay on during the next storm.
Frequently Asked Questions
Can I install a transfer switch without pulling a permit?
Technically, you can, but you really shouldn’t. Most local building codes require a permit for any work that involves your main electrical panel. Skipping the permit means no inspection, which leaves potential wiring errors hidden. It can also cause problems when you sell your house.
Do I need a transfer switch if I only want to power a few appliances?
You can use heavy-duty extension cords for a couple of small items, but a transfer switch is the only safe option for connecting your generator to your home’s wiring. Connecting a generator directly to an outlet without a transfer switch creates dangerous backfeeding. That puts utility workers and your family at serious risk.
What is the difference between a 30-amp and 50-amp transfer switch?
The amperage rating tells you how much power the switch can safely handle. A 30-amp switch supports up to 7,200 watts, which covers about six to ten circuits. A 50-amp switch handles bigger loads and more circuits, but it also costs more and requires a larger generator.
Can I plug a generator into my dryer outlet instead of installing a transfer switch?
This is an extremely dangerous hack that we strongly discourage. It bypasses the safety features that isolate your generator from the utility grid. You risk electrocuting a lineman working to restore your power. Stick with a proper transfer switch.
Will a transfer switch work with any portable generator?
Most modern portable generators with standard outlets will work with a manual transfer switch. You just need the correct generator cord that matches both the switch’s inlet and your generator’s outlet. Always check your generator’s wattage and plug style before you buy any switch or cord.