Generator Transfer Switch Installation Manual: Step-by-Step Guide
The safest way to install a generator transfer switch is to hire a licensed electrician, but if you choose the DIY route, you must disconnect your home from the grid and follow your local electrical code to the letter. This generator transfer switch installation manual walks you through the process so you can power your home safely during an outage.
We researched the most common installation mistakes and found that improper grounding and incorrect load calculations cause the majority of problems. A transfer switch prevents dangerous backfeeding, which can electrocute utility workers and damage your generator. You need to know your wattage needs, pick the right switch type, and understand the wiring basics before you touch a single screw.
- Plan first: Calculate your total wattage and choose a transfer switch that matches your generator’s output.
- Pick the right type: Manual switches are cheaper; automatic ones start your generator on their own.
- Shut it all down: Always turn off the main breaker before wiring anything.
- Connect the generator cord: Use a heavy-duty, four-prong cord rated for outdoor use.
- Test everything: Run the system before you need it in an emergency.
Below, we’ll walk you through the entire installation step by step, from gathering tools to testing your final setup.
Setting Up Your Generator Transfer Switch the Right Way
You’ve got your generator ready. You have the extension cords, but you want something better. A transfer switch lets you power hardwired items like your furnace or well pump without running a dozen cords through the window.
This part of the guide covers the hands-on steps. We found that a little planning goes a long way here. You’ll learn how to match parts, stay safe, and wire everything like a pro.
Gather Your Tools and Materials First
Nothing slows a project down like hunting for a screwdriver mid-task. Before you turn off the power, grab everything you need. We found that having the right gear prevents most installation headaches.
- Voltage tester (non-contact pen style is easiest)
- Flathead and Phillips screwdrivers
- Wire strippers and cutters
- Hammer and screw anchors (for mounting the box)
- Heavy-duty outdoor generator cord (four-prong)
- Your transfer switch kit and manual
Check your local hardware store for code-compliant parts. Many kits include the switch, but you might need extra conduit or wire nuts.
Double-Check Your Generator’s Output
Your generator must match the switch rating. If you have a 5,000-watt generator, don’t buy a 10,000-watt switch. It won’t protect your equipment correctly.
Look at the generator’s nameplate. It shows watts and amps. Compare that to the switch’s rating. They should be close, with the switch rated slightly higher.
Understand Your Home’s Electrical Panel
Your main breaker panel is the heart of your home’s wiring. You’ll connect the transfer switch between the meter and your main panel. Or, you might mount it right next to the panel.
Many experts say the safest setup uses a service-rated transfer switch. That means it can handle the full power coming from the utility. Non-service-rated switches are cheaper but have more restrictions.
Know Your Breaker Types
Open your panel cover and look at the breakers. You’ll see single-pole (120-volt) and double-pole (240-volt) breakers. Your switch needs to accommodate both if you power a dryer or electric water heater.
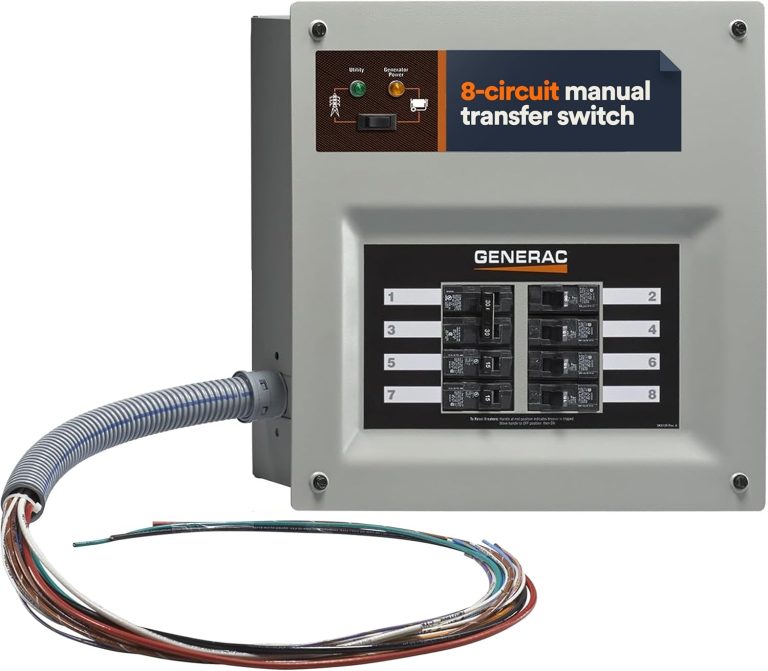
Count the spaces in your panel. A 10-circuit switch needs ten available slots. If your panel is full, you’ll need to add a sub-panel or choose fewer circuits.
Choosing Between Manual and Automatic Transfer Switches
This decision shapes your whole setup. A manual switch requires you to walk outside and start the generator. An automatic one senses the outage and starts everything by itself.
We found that most homeowners choose manual switches because they cost less. Automatic switches are convenient but require more complex wiring and a starter battery for the generator.
Manual Transfer Switch Pros and Cons
You control when the generator starts. That means you can wait out short blips. It also means you save money on the equipment.
- Lower upfront cost
- Simpler wiring for DIYers
- Requires you to be home to start it
- Works well for occasional outages
Automatic Transfer Switch Pros and Cons
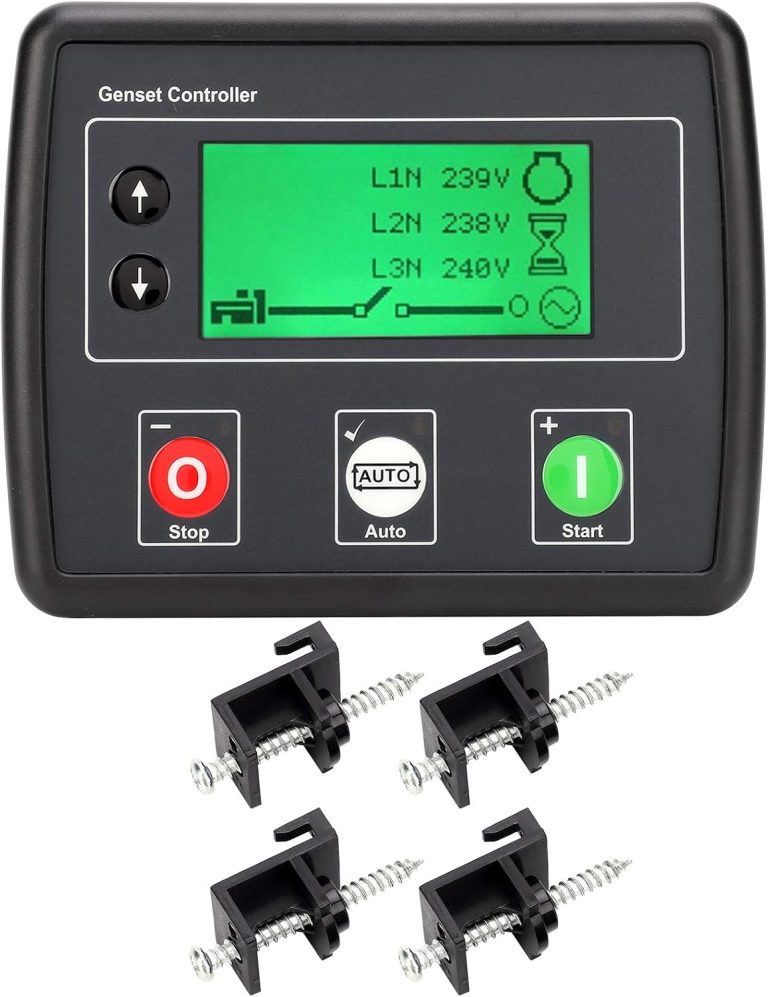
An automatic switch acts like a silent watchdog. The power goes out, and the generator fires up on its own. It’s perfect for people who travel or have medical equipment at home.
The trade-off is complexity. The switch needs a control wire to the generator. It also needs a battery charger to keep the generator ready. Many experts say this setup is best left to professionals.
Step-by-Step Installation Process for Your Transfer Switch
This is the meat of the process. Take your time. We found that rushing leads to loose connections and tripped breakers. Work methodically and double-check every step.
Step 1: Turn Off All Power to Your Home
Flip the main breaker to the OFF position. Then, switch off every individual breaker in the panel. This ensures zero current flows through your wires.
Use your voltage tester on the main wires coming into the panel. It should read zero. If it doesn’t, call a professional immediately. Do not touch anything hot.
Step 2: Mount the Transfer Switch Box
Pick a spot near your main panel, usually within a few feet. The switch needs to be accessible and out of the way. Use the mounting holes as a template.
Drill pilot holes and insert wall anchors. Secure the box with screws. Make sure it’s level and snug. A wobbly box makes wiring harder and looks unprofessional.
Step 3: Run Conduit Between the Panels
You’ll need a conduit to protect the wires running between the transfer switch and your main panel. This is usually metal or PVC pipe. The size depends on how many wires you’re running.
Measure the distance carefully. Cut the conduit to length and attach it to both boxes using connectors. Leave some slack in the wires so you can work comfortably.
Step 4: Connect the Wires to the Transfer Switch
Inside the transfer switch, you’ll see terminals labeled LINE, LOAD, and NEUTRAL. LINE connects to the utility power. LOAD connects to your selected circuits. The neutral wires all tie together.
Strip about half an inch of insulation off each wire. Insert them into the correct terminals and tighten the screws firmly. Loose connections cause heat and arcing.
Wiring the Individual Circuits
This is where you choose which circuits get backup power. Start with essentials: fridge, furnace, well pump, and lights. Each circuit’s wire gets moved from the main panel to the transfer switch.
Label each wire with a marker as you disconnect it. This saves you from guessing later. Connect the wire to the corresponding breaker in the transfer switch.
Step 5: Ground Everything Properly
Grounding is non-negotiable. The transfer switch must be bonded to your home’s grounding system. This directs stray electricity safely into the earth.
Run a green or bare copper wire from the ground bus in your main panel to the ground terminal on the switch. We found that improper grounding is a top cause of electrical failures in DIY installs.
Step 6: Connect the Generator Cord Inlet
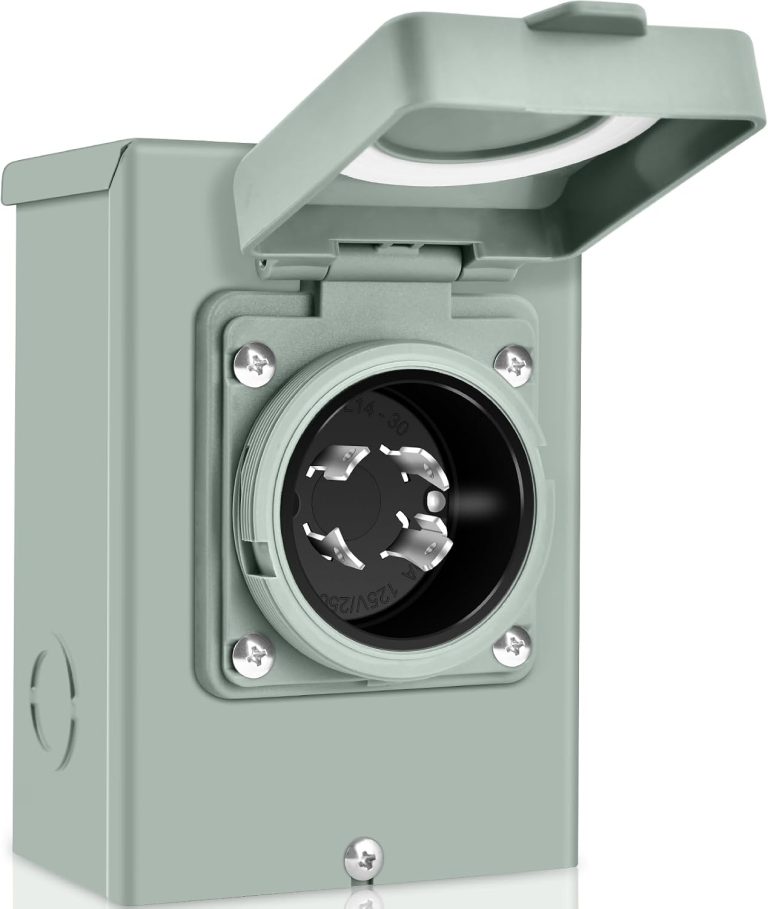
This is the outdoor box where you plug in your generator cord. It mounts on an exterior wall near the generator’s parking spot. Run conduit from the inlet to the transfer switch.
Inside the transfer switch, connect the inlet’s wires to the GENERATOR terminals. These are usually labeled with a plug icon. Make sure the prong configuration matches your generator’s outlet.
Testing Your Transfer Switch Setup Safely
You’re almost done. Testing ensures everything works before you rely on it during a storm. Start your generator and let it warm up for a few minutes.
Plug the generator cord into the inlet. Then, turn on the main breaker in the transfer switch. You should hear the relay click as it switches power sources.
Check Each Circuit One by One
Flip each breaker in the transfer switch to ON. Walk through your house and test the outlets and appliances on those circuits. If something doesn’t work, turn everything off and check your connections.
We found that one mislabeled wire is the most common test failure. Double-check that each circuit’s wire goes to the correct breaker. It’s a simple fix once you identify the problem.
Verify the Power Transfer Back to Utility
Turn off the generator and unplug the cord. Then, switch the transfer switch back to LINE. Flip the main breaker on. Your home should now run on utility power again.
Test a few outlets to confirm. If the lights come on, you’re good. If not, turn everything off and revisit your wiring. Never leave the system in a half-connected state.
Common Installation Mistakes to Avoid
You can save yourself a ton of frustration by learning from others’ errors. We found that most issues come from a few repeat offenders. Avoid these and your install will go smoothly.
- Oversizing the switch: A huge switch won’t protect your small generator.
- Forgetting the ground wire: This is dangerous and can shock you or damage equipment.
- Mixing up LINE and LOAD: Reversed connections create a serious backfeed hazard.
- Skipping the permit: Many areas require an inspection. Check with your city office.
- Using a 3-prong cord: Modern generators use 4-prong for 240-volt systems. Match them exactly.
Understanding Your Local Electrical Codes and Permits
Building codes exist for a reason. They keep your family safe. Most municipalities require a permit for transfer switch installation. Some require a licensed electrician to do the work.
Call your local building department before you start. Ask about permit fees and inspection requirements. It might feel like a hassle, but it’s better than a failed inspection or a house fire.
When to Hire a Professional Instead
If your panel is old or you feel unsure about any step, hire a pro. There’s no shame in it. A licensed electrician knows local codes and can finish the job in a few hours.
We found that hiring a pro costs between 300 and 800 dollars for a typical installation. That’s a small price for peace of mind. Your family’s safety is worth more than the savings on a DIY job.
Final Checklist Before You Rely on Your System
You’ve done the work. Now, run through this quick list before you declare victory. A few minutes of checking now saves you from being in the dark later.
- Main breaker is OFF when connecting or disconnecting the generator cord.
- All wire connections are tight and secure.
- Ground wire is connected at both ends.
- Generator cord is rated for outdoor use and matches the inlet.
- Transfer switch cover is closed and latched.
- You have tested the system with the generator running.
Once you check these boxes, you’re ready for the next storm. Remember, your generator needs regular maintenance too. Change the oil, check the fuel, and run it monthly to keep it ready.
If anything feels off during your test, stop and call an electrician. A safe install is a successful install. You’ve got this, and your home will thank you when the lights stay on.
Conclusion
You now have the full picture for installing a generator transfer switch. The key is to plan your wattage, match your parts, and never skip the ground wire. We covered the step-by-step wiring, testing, and common pitfalls. Your safety and your family’s safety come first, always.
Before you start, call your local building department about permits. If you hit any step that feels confusing, hire a licensed electrician. The cost is worth it for peace of mind. Take your time, double-check your connections, and test everything twice. You’ve got this. Your home will stay powered and safe when the next storm hits.
Frequently Asked Questions
Can I install a generator transfer switch myself?
Yes, many homeowners do it themselves. You need solid electrical knowledge and comfort working inside a panel. Check your local codes first, since some areas require a licensed electrician to pull the permit.
What size transfer switch do I need for my generator?
Match the switch rating to your generator’s wattage output. Look at the generator nameplate for watts and amps. Choose a switch rated slightly higher than your generator’s output. This protects your equipment and prevents overloads.
Do I need an electrician to install a transfer switch?
Not always, but it depends on your local regulations. Many jurisdictions allow DIY installs with a permit and inspection. If your panel is older or you feel unsure, hiring a pro is the smarter choice for safety.
How long does it take to install a generator transfer switch?
A typical DIY install takes between 4 and 8 hours. This includes mounting the box, running conduit, wiring circuits, and testing. Professionals usually finish in 2 to 4 hours. The time depends on your panel’s layout and how many circuits you connect.
What happens if I wire a transfer switch wrong?
Wiring it wrong can cause backfeeding, which sends electricity into utility lines. That’s dangerous for line workers and can damage your generator. Mixing up LINE and LOAD terminals is a common error. Always double-check your connections and test before relying on the system.