Generator Transfer Switch Installation Kit: Essential Guide
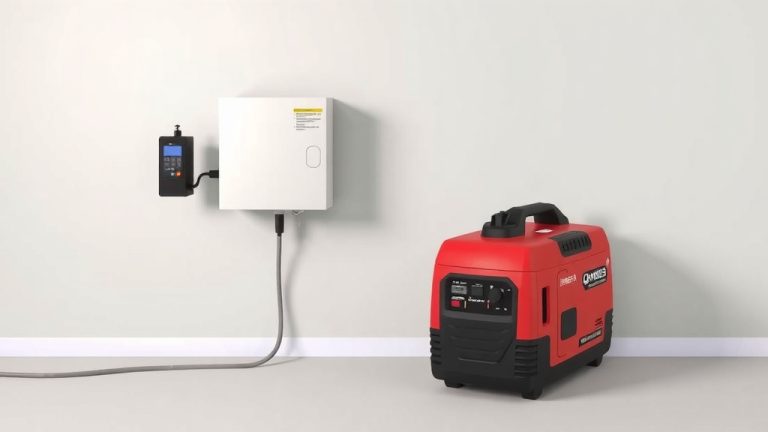
Yes, a generator transfer switch installation kit gives you everything you need to safely connect a portable generator to your home’s electrical panel. This kit is the essential bridge that lets you power your circuits without running extension cords through the house. It also protects you and utility workers from dangerous backfeed during an outage.
We found that most homeowners can handle this project in a weekend with basic tools. The kit typically includes the transfer switch unit, a mounting bracket, and all the necessary wiring components. You pair it with a generator inlet box and a power cord to create a complete, safe setup.
- Know your power needs: Count the watts of your essential appliances before buying a kit.
- Pick the right size: Match the kit’s amperage, usually 30-amp or 50-amp, to your generator’s output.
- Plan the location: It mounts indoors, next to your main breaker panel.
- Budget for extras: You may need a separate inlet box and a heavy-duty extension cord.
- Hiring is an option: A licensed electrician can do the work for a few hundred dollars.
Below, we break down exactly what comes in these kits, how to choose the right one, and the simple steps to install it yourself. Let’s walk through how to get your home ready for the next power outage.
Understanding What Comes Inside a Transfer Switch Kit
You open the box and wonder, is this really enough to power my house? We found that most kits look smaller than you expect, but they do the heavy lifting. The main unit is a metal box with a manual lever or breakers inside. That box becomes your new command center during outages.
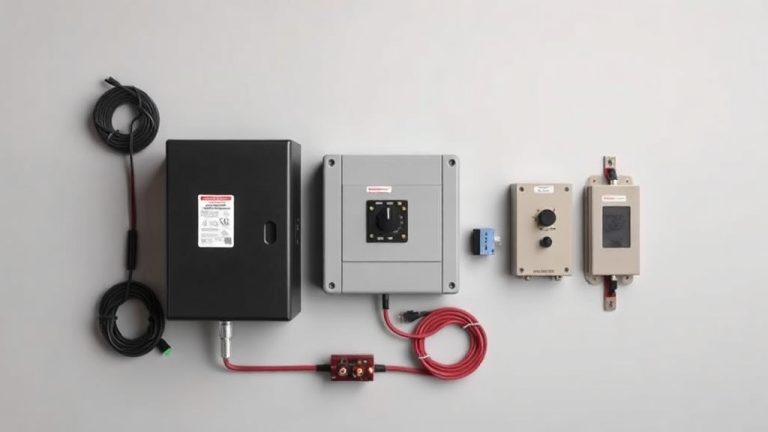
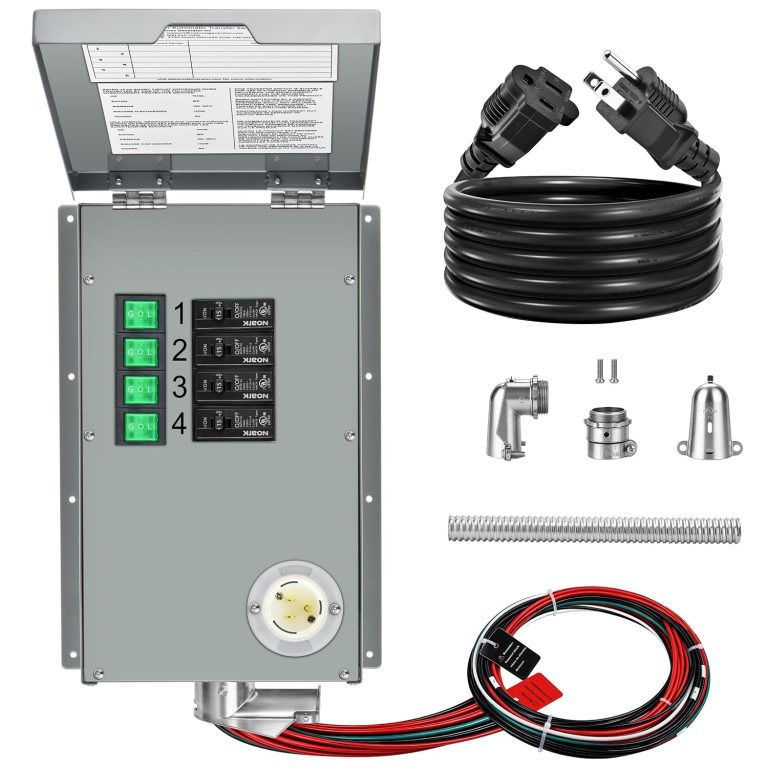
The kit usually includes the transfer switch unit itself, a mounting bracket, and the wiring terminals you need to connect to your panel. Some kits even come with a pre-wired harness, which saves you from messy wire management. You will still need to buy the generator inlet box and the power cord separately, so plan for those extras in your budget.
The Core Components You Can Expect
Let’s break down each piece so you know exactly what you are working with. The transfer switch unit is the star of the show. It has a manual handle or individual breakers that let you choose which circuits get power. You flip these to switch between utility power and generator power.
The mounting bracket holds the switch securely to your wall. It keeps the unit level and prevents any movement during use. The wiring terminals are pre-attached to the switch, so you just match them up to your panel’s circuits. Many kits also include a neutral bonding jumper and grounding lug for safety compliance.
Why the Inlet Box Is Not Included
Here is a common surprise for first-timers. The inlet box, which mounts on your exterior wall, is sold separately in many cases. This box is where you plug in the generator cord from outside. You will need a weatherproof inlet box rated for the same amperage as your switch. We found that buying these parts together as a bundle saves you money, but check the listing carefully.
Choosing the Right Size for Your Home’s Needs
Your generator’s wattage and your home’s electrical panel dictate which kit size you need. We found that most homes use either a 30-amp or 50-amp transfer switch. A 30-amp kit handles up to 7,500 watts, which covers your refrigerator, lights, and a few outlets. A 50-amp kit handles up to 12,500 watts, enough for a well pump or a window air conditioner.
Start by listing the appliances you cannot live without during an outage. Add up their running watts. Then check your generator’s output on the nameplate. That number tells you which amperage rating to match. Buying a larger switch than your generator can feed is wasted money. Buying a smaller one overloads your generator.
Counting Circuits: How Many Do You Really Need
Transfer switch kits come with a specific number of circuits, usually 6, 8, 10, or 12. A 6-circuit switch is enough for the essentials. An 8 or 10-circuit switch gives you more flexibility for a home office or a sump pump. You cannot add circuits later, so choose wisely upfront.
We found that homeowners often underestimate their needs by one or two circuits. Think about your garage door opener, your internet router, and your phone chargers. Those add up fast. If you have a gas furnace, you need one circuit for the blower motor. If you have an electric water heater, that is a big draw on a 50-amp switch.
Matching the Kit to Your Generator Cord
The power cord that connects your generator to the inlet box must match both ends. One end plugs into the generator’s outlet, and the other end plugs into the inlet box. Most portable generators have a 30-amp twist-lock outlet or a 50-amp outlet. The inlet box and switch must use the same amperage and plug style. Check your generator’s outlet shape before ordering anything.
Planning the Installation Location
Where you mount the transfer switch matters as much as which kit you buy. The switch must be within reach of your main breaker panel because the wiring runs between them. The National Electrical Code says the switch should be close to the panel, but not directly on top of it. You want enough clearance to work on both units without hassle. Learn more about installing a transfer switch indoors and the clearance rules that apply.
Most people mount the transfer switch on the wall beside the main panel. You will need to see the switch’s lever or breakers easily. The unit should be at a comfortable height, around eye level. If you have a finished basement, find a stud to anchor the bracket. If you have drywall, use hollow-wall anchors rated for the switch’s weight.
Check Your Clearance and Ventilation
Your transfer switch needs breathing room, just like your electrical panel. The National Electrical Code requires at least 30 inches of clearance in front of both units. That space lets you open the panel door fully and work on the wiring safely. Do not mount the switch in a closet or behind a door that blocks access.
Keep the switch away from water sources like a laundry sink or a basement sump pit. Moisture and electrical components do not mix. If your panel is in a garage, mount the switch on an interior wall, not an exterior one. Exterior walls have insulation and temperature swings that can cause condensation.
Tools You Will Need Before Starting
You probably already own most of the tools for this job. Here is what we found to be essential:
- A voltage tester to confirm the power is off
- A screwdriver set, both flathead and Phillips
- A drill with a 1/4-inch bit for mounting screws
- A wire stripper for preparing the cable ends
- A flashlight or work light for dim areas
- A level to keep the switch straight
You do not need a torque wrench for most kits, but a pair of insulated gloves is a smart safety addition. Wear rubber-soled shoes and avoid working on a damp floor.
Step-by-Step Installation Overview
We found that the installation process follows a logical sequence. You do not need to be an electrician, but you need patience and attention to detail. The entire process takes most people four to six hours on a Saturday. Let’s walk through the major steps so you know what to expect.
First, turn off the main breaker and all individual breakers in your panel. Use your voltage tester to confirm there is no live power. Then mount the transfer switch bracket to the wall next to the panel. The bracket needs to be level and firmly anchored to a stud.
Connecting the Wires Safely
Once the switch is mounted, you will run a cable from the main panel to the transfer switch. The kit includes a flexible metal conduit or a cable clamp for this purpose. Feed the wires through the knockout holes on both units. Then connect the wires to the transfer switch’s terminals, matching the colors and labels exactly.
Next, you will connect the individual circuit wires from your panel to the transfer switch. Each circuit you want to power gets disconnected from the panel and reconnected to the switch. The kit includes wire nuts and labels for this step. Double-check each connection before tightening the terminals.
The Grounding and Bonding Connection
Proper grounding is non-negotiable for safety. The transfer switch kit includes a ground bar and a bonding screw. Connect the ground wire from your panel to the ground bar in the switch. Then connect the generator’s ground wire through the inlet box. Many experts say that a missing ground connection is the most common installation mistake (Consumer Product Safety Commission).
Testing Your New Setup
You finish wiring and feel a mix of pride and nerves. Testing is the fun part because you see everything come to life. Start by turning on the main breaker and the utility power. Check that your panel’s circuits work normally with the transfer switch in the “Utility” position. Then turn off the main breaker to simulate an outage.
Plug in your generator outside and let it run for a few minutes to stabilize. Go inside and flip the transfer switch to “Generator” position. Turn on the individual breakers one at a time. You should hear your refrigerator hum and see the lights glow. If anything trips, turn it off and check your wiring connections.
A Simple Pre-Outage Checklist
Once your installation is complete, run through this checklist every few months to stay prepared:
- Test the transfer switch with a generator run every 30 days
- Inspect the inlet box for rust, cracks, or loose screws
- Check the power cord for frayed insulation or bent prongs
- Keep the area around the switch clear of clutter and dust
- Confirm the main breaker turns off and on smoothly
- Store the generator cord in a dry, accessible spot
When to Call a Licensed Electrician
We found that many homeowners complete this project without professional help. But there are situations where you should call an electrician. If your panel is more than 30 years old, the wiring may not meet current code. If you are unsure about any step, a licensed electrician can do the entire job in about two hours.
The cost of hiring an electrician ranges from $300 to $600 for labor, plus the cost of the kit. That is a small price for peace of mind when you are dealing with 240-volt electricity. Many local codes require a permit for this work, and an electrician will handle the inspection for you.
Never attempt to install a transfer switch if you feel uncertain about any part of the process. Electricity is not forgiving, and a mistake can damage your appliances or create a fire hazard. There is no shame in asking for help.
Permits and Local Code Requirements
Check with your local building department before you start. Many municipalities require a permit for any work on your electrical panel. The permit fee is usually under $50 and includes an inspection. That inspection confirms your work meets the National Electrical Code, which protects you and your family.
Some insurance companies also want proof of a professional installation. Call your home insurance agent and ask if a DIY transfer switch affects your policy. We found that most companies are fine with a permitted and inspected installation, but it is better to know upfront.
Common Mistakes to Avoid During Installation
You will find plenty of online forums full of horror stories from DIY installs. We found that most mistakes come down to rushing or skipping the manual. Read the entire instruction booklet before you touch a single wire. The manufacturer’s sequence exists for a reason.
One frequent error is mixing up the hot and neutral wires. Your transfer switch has clearly labeled terminals, but it is easy to transpose them when you are tired. Another mistake is over-tightening the terminal screws, which strips the threads and creates a loose connection.
Do not forget to connect the ground wire from the generator to the inlet box. A floating ground can cause electrical shocks or damage to sensitive electronics. Take your time, label every wire, and take photos before you disconnect anything.
Your effort pays off when the lights stay on during a storm. You will feel a real sense of accomplishment knowing your family is safe and comfortable. And the next time the power flickers, you will be ready in minutes, not hours.
Conclusion
You have everything you need to make the right call on a generator transfer switch installation kit. We walked through the components, the sizing, and the step-by-step process to wire it safely. The key is matching the kit to your generator and planning your circuit count before you buy.
You can do this project yourself, but do not rush. Read the manual, double-check your connections, and test everything before you need it. If you feel unsure at any point, calling a licensed electrician is a smart investment.
Your next step is simple: grab your generator’s model number and head to your local home improvement store. Compare the amperage and circuit counts, then grab the kit that fits your needs. Your family will thank you when the lights stay on.
Frequently Asked Questions
Can I install a transfer switch myself or do I need an electrician?
Yes, you can install it yourself if you are comfortable working with electrical panels. The job takes most homeowners a weekend and requires basic tools like a screwdriver and drill. If you have an older panel or feel unsure, hire a licensed electrician. The labor cost is worth the peace of mind.
What is the difference between a manual and automatic transfer switch?
A manual transfer switch requires you to flip a lever and turn on breakers when the power goes out. An automatic switch detects the outage and starts your generator on its own. Automatic switches are more expensive and usually paired with standby generators, not portable ones. For a portable generator, a manual switch is the standard choice.
Will a transfer switch work with any portable generator?
Your generator needs to have the right outlet type and wattage to match the switch. Most portable generators have a 30-amp twist-lock outlet or a 50-amp outlet. Check your generator’s outlet shape and output wattage on the nameplate before buying a kit. If they do not match, you will need an adapter or a different kit.
How many circuits should my transfer switch have?
A 6-circuit switch covers the basics like your fridge, lights, and a few outlets. An 8 or 10-circuit switch gives you room for a sump pump, internet router, or home office equipment. You cannot add circuits later, so choose one or two more than you think you need. Think about your furnace blower and garage door opener too.
Do I need a permit to install a generator transfer switch?
Most local building departments require a permit for any work on your electrical panel. The fee is usually under $50 and includes a safety inspection. Check with your local office before you start to avoid fines or issues with your home insurance. A permitted installation also confirms your work meets the National Electrical Code.