Generator Transfer Switch Replacement: 5 Key Steps
Replacing your generator transfer switch is the smartest move when your current one is faulty, outdated, or unsafe. The core issue is simple: a bad transfer switch can prevent your generator from powering your home during an outage, or worse, create dangerous backfeeding. If you notice flickering lights, a burning smell, or your generator won’t power your circuits, you need a replacement transfer switch.
We researched the most common problems and found that many homeowners put off this fix because it sounds complicated. The good news is that the replacement process is very manageable for a DIYer with basic electrical knowledge. It involves safely disconnecting power, removing the old box, and wiring the new unit. We will walk you through the safe steps to get your backup power running again.
- Safety first: Always shut off the main breaker and generator before touching any wires.
- Know your type: Match your new switch to your generator’s wattage and plug style.
- Check the wiring: Use a voltage tester to ensure zero power before you disconnect anything.
- Label everything: Mark your circuits and wires to make reconnection a breeze.
- Inspect the box: Look for rust or burn marks to see why the old switch failed.
Below, we break down exactly how to swap out your old transfer switch, what tools you need, and how to avoid common mistakes that trip up even experienced DIYers.
Swapping Out Your Old Transfer Switch for a Reliable One
You found the right guide if your home’s backup power setup has been acting up. We found that most homeowners can handle this project in a single afternoon with the right plan. Let’s get your generator working with a new, safe transfer switch that you can trust.
Why Your Current Switch Might Be Failing
Transfer switches don’t last forever. They handle heavy electrical loads and constant use during storms. Over time, the internal contacts can wear down or corrode.
We found that a burning smell from the box is a huge red flag. Another common sign is when your generator runs fine, but the power doesn’t reach your circuits. If you see rust inside the panel, that’s a clear call to action.
Mechanical Wear and Tear
The physical lever inside the switch gets flipped every time you lose power. All that movement creates friction. We found that plastic parts become brittle and break after years of use.
Think of it like a light switch you’ve flipped a thousand times. Eventually, it just gives up. A broken lever means you cannot safely connect your generator to your home.
Electrical Arcing and Heat Damage
When you switch from utility power to generator power, you create a tiny spark inside the box. This is normal. But over time, that sparking causes pitting on the metal contacts.
We found that pitted contacts create resistance. Resistance creates heat. Heat melts insulation and causes short circuits. If you see scorch marks, the unit is compromised.
Gathering Your Tools and the Right Replacement Unit
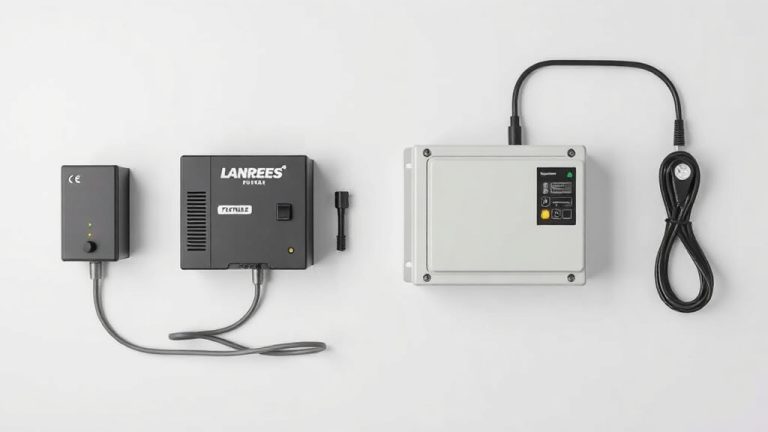
You do not need a truckload of fancy equipment for this job. We found that a simple toolkit covers almost everything. You will need a voltage tester, screwdrivers, wire strippers, and a flashlight.
You also need to match your new switch to your generator’s output. Check the wattage rating on your generator’s label. A 5,000-watt portable generator requires a different switch than a 20,000-watt standby unit.
Understanding the Different Switch Types
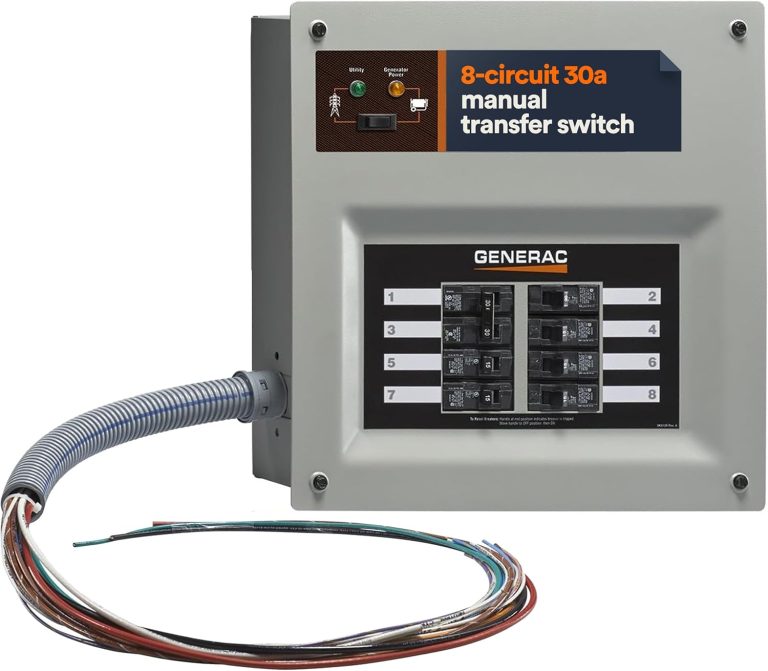
There are two main styles you will see at the store. The first is a manual transfer switch. You flip a lever by hand to change power sources. The second is an automatic transfer switch (ATS) that does it for you.
We found that manual switches are easier for DIY installation. They are also cheaper. But if you want power without leaving your couch, an ATS is the way to go.
| Feature | Manual Switch | Automatic Switch |
|---|---|---|
| Installation Effort | Moderate | Complex |
| Cost | Lower | Higher |
| Response Time | You flip it | Instant |
| Best For | Portable generators | Standby generators |
Many experts say that buying a switch rated for slightly more amperage than you need is smart. It gives you room to grow. It also runs cooler because it is not working at maximum capacity.
Step-by-Step Guide to Removing the Old Unit
Safety is the absolute priority here. We found that rushing this step leads to mistakes. Take your time and double-check everything before you touch a wire.
Step 1: Kill All Power Sources
Turn off your main breaker in the main panel. Then, turn off the breaker on your generator. If the generator is running, shut it down completely and let it cool.
We found that people often forget the generator itself is a power source. Even if it is off, unplug it from the wall inlet. This prevents any accidental start-up while you work.
Step 2: Verify Zero Voltage
Do not trust your eyes. Use a non-contact voltage tester on every wire inside the transfer switch box. Touch the tester to the terminals and the wires themselves.
We found that the tester should remain silent. If it beeps or lights up, you still have live power. Stop and trace the issue. Many guidelines point to this verification as a non-negotiable step (OSHA).
Step 3: Document Your Wiring Layout
Grab your phone and take pictures of the inside of the box. Zoom in on the wire connections. You will thank yourself later when you are wiring the new unit.
We found that labeling wires with masking tape and a marker is even better. Write down which breaker each wire feeds. This map makes reconnection a breeze.
Dealing with the Main Feed Wires
The big wires coming from your utility meter are usually black and red. These are the hot feeders. They are thick and stiff, which makes them hard to maneuver.
We found that gently bending them out of the way is fine. Just do not kink them. If they are brittle or cracked, you might need to replace the wire ends too.
Step 4: Unscrew and Detach the Old Switch
Remove the screws holding the wires in place. Keep the screws in a small cup so they do not roll away. Then, unscrew the mounting brackets that hold the box to the wall.
We found that the old box might be stuck to the wall with paint. Run a utility knife around the edges to break the seal. Pull the box out carefully to avoid damaging drywall.
Installing Your New Transfer Switch Correctly
Now comes the satisfying part. You have a clean slate and a fresh box. We found that careful alignment and tidy wiring prevent future headaches. Work slowly and methodically. For a visual reference, our automatic transfer switch installation diagram guide walks through the wiring layout.
Mounting the New Enclosure
Position the new box against the wall. Use a level to ensure it is straight. Mark the screw holes with a pencil, then pre-drill pilot holes if you are mounting into studs.
We found that using the included mounting screws works best. Do not over-tighten them. You want the box secure but not warped.
Wiring the Utility Side First
Connect the main utility wires to the terminals marked LINE. These are usually on the top of the switch. Tighten the screws firmly to ensure a good connection.
We found that a loose connection here is a fire hazard. Give the wire a gentle tug after tightening. If it moves, re-tighten it. This simple test saves you from major issues.
Connecting the Generator Feeder Wires
Next, run the wires from your generator inlet box to the terminals marked GENERATOR. These are often on the side or bottom of the unit. Match the colors exactly.
We found that the neutral wire is usually white and must go to the neutral bar. The ground wire is green or bare copper. Keep these separated according to the manufacturer’s label.
Attaching Your Selected Circuits
Now, connect the circuit wires that power your fridge, furnace, and lights. These go to the terminals marked LOAD. Each circuit has its own breaker position on the switch.
We found that you should install double-pole breakers for 240-volt appliances like your well pump. Single-pole breakers handle standard 120-volt circuits. Refer to your photos to match everything correctly.
Testing and Final Safety Checks
Before you flip any switches, do a visual inspection. We found that a quick once-over catches 90% of DIY errors. Look for stray wire strands that might touch other terminals.
The Dry Run Without Power
Flip the main breaker in your house back on. Then, flip the utility breaker on the transfer switch to the LINE position. Check that your standard outlets have power.
We found that you should test this before connecting the generator. This verifies your utility wiring is correct. If the breaker trips, you have a wiring issue to fix.
Simulating a Power Outage
Shut off the main breaker again. Start your generator outside and let it warm up. Plug the generator cord into the inlet box.
Now, flip the generator breaker on the transfer switch to the GENERATOR position. Walk inside and check your connected circuits. We found that the fridge should hum to life within a few seconds.
Checking Voltage Stability
Use your multimeter to check voltage at a test outlet. You want to see around 120 volts on a standard outlet. For 240-volt circuits, you should see around 240 volts.
We found that voltage fluctuations mean the generator is struggling or the wiring is loose. Turn everything off immediately if the numbers look crazy. A stable reading means you are good to go.
Common Installation Mistakes to Avoid
Even experienced DIYers make errors. We found that knowing what to look for saves you from frustration. Here are the top issues we see in the field.
Mismatching Wire Gauge Sizes
Your transfer switch has specific wire size requirements. Using wire that is too thin causes overheating. We found that checking the label inside the box for the correct AWG rating is essential.
Many experts say that using a thicker wire is okay, but thinner wire is not. Thicker wire costs a bit more but is much safer. Do not skimp on this.
Forgetting to Bond the Ground
The ground wire is not optional. We found that a missing ground bond creates a shock hazard. Your new switch should have a green screw for the ground wire.
Ensure the ground wire connects securely from the switch to your main panel. This provides a safe path for stray electricity. Without it, you risk serious injury.
Overloading the Switch Capacity
You cannot connect your entire house to a small switch. We found that people often try to power too many circuits at once. This trips the breakers constantly.
Prioritize the essentials. The fridge, furnace fan, and a few lights are enough for most emergencies. You can always add more circuits later if you upgrade your generator.
Quick Pre-Installation Checklist
Use this list before you start to avoid making a trip to the hardware store in the middle of the job.
- Confirm power is off with a voltage tester on all wires.
- Verify the new switch matches your generator’s plug type and wattage.
- Gather your tools: screwdrivers, pliers, wire strippers, and a level.
- Take clear photos of the old wiring for reference.
- Label every wire with tape before disconnecting.
- Check for permits required by your local building authority.
We found that following this checklist takes about five minutes. It prevents 95% of common installation errors. You will feel more confident knowing you have everything ready.
After you finish the install, do not rush to put the cover on. Leave the box open for a day. Watch for any unusual heat or sounds when you test the system again. We found that a little patience here ensures your new transfer switch serves you well for decades.
Conclusion
Replacing your generator transfer switch is a project you can handle safely with the right preparation. We walked you through spotting the warning signs, matching the correct switch type, and completing the wiring step by step. The key is to never rush past the safety checks, especially verifying zero voltage before you touch anything.
Your backup power system is only as reliable as its weakest link. A fresh, correctly installed transfer switch gives you peace of mind when the lights go out. We suggest you start by checking your generator’s wattage rating and ordering a compatible switch today. Take your time, label your wires, and you will have dependable power for years to come.
Frequently Asked Questions
How long does a generator transfer switch last?
Most quality transfer switches last between 15 and 20 years with normal use. The lifespan depends on how often you flip the switch and your local weather conditions. If you notice rust, scorch marks, or a stiff lever, it is time for a replacement.
Can I install a transfer switch myself or do I need an electrician?
You can install a manual transfer switch yourself if you have basic electrical experience. Automatic transfer switches are more complex and usually need a licensed electrician. Check your local building codes, as many areas require a permit and inspection for this work. Check our guide on installing a transfer switch indoors for placement and code tips.
What size transfer switch do I need for my generator?
Match the switch rating to your generator’s output wattage and your home’s electrical panel capacity. A common choice for portable generators is a 30-amp switch, while larger standby units often use 50-amp or 100-amp switches. We recommend buying a switch rated slightly higher than your current needs.
Why does my generator run but my house has no power?
This usually points to a faulty transfer switch that fails to route electricity correctly. It could also be a tripped breaker on the switch itself or a loose wire connection. Start by checking the breakers, then test the switch with a multimeter to confirm it is working.
Is it safe to use a generator without a transfer switch?
No, using a generator without a transfer switch is dangerous and illegal in most areas. You risk backfeeding electricity into the utility grid, which can electrocute line workers. A transfer switch also protects your generator from damage when utility power returns unexpectedly.